My First Zine: Lessons Learned
Understanding the Zine-Making Process
Creating a zine is an intricate process that requires planning, creativity, and attention to detail. From the initial concept to the final product, there are several key steps that can make or break your project. Whether you're a seasoned artist or just starting out, understanding these elements will help you navigate the challenges of producing a high-quality zine.
01. Establish Your Binding Technique Early On
Before diving into the design or printing process, it's crucial to decide on the binding method for your zine. Different types of binding—such as saddle stitching, perfect binding, or spiral binding—require specific document setups and design considerations. By determining your preferred binding technique early on, you can ensure that your layout and materials align with the final production needs.
This step also helps you understand what kind of printer or print finishing studio you might need. If you plan to handle the binding yourself, it's wise to consult with a technician at a print finishing studio. They can guide you through the best options for your design and provide insights into how to set up your document accordingly.
02. Set Up Your InDesign Document Correctly
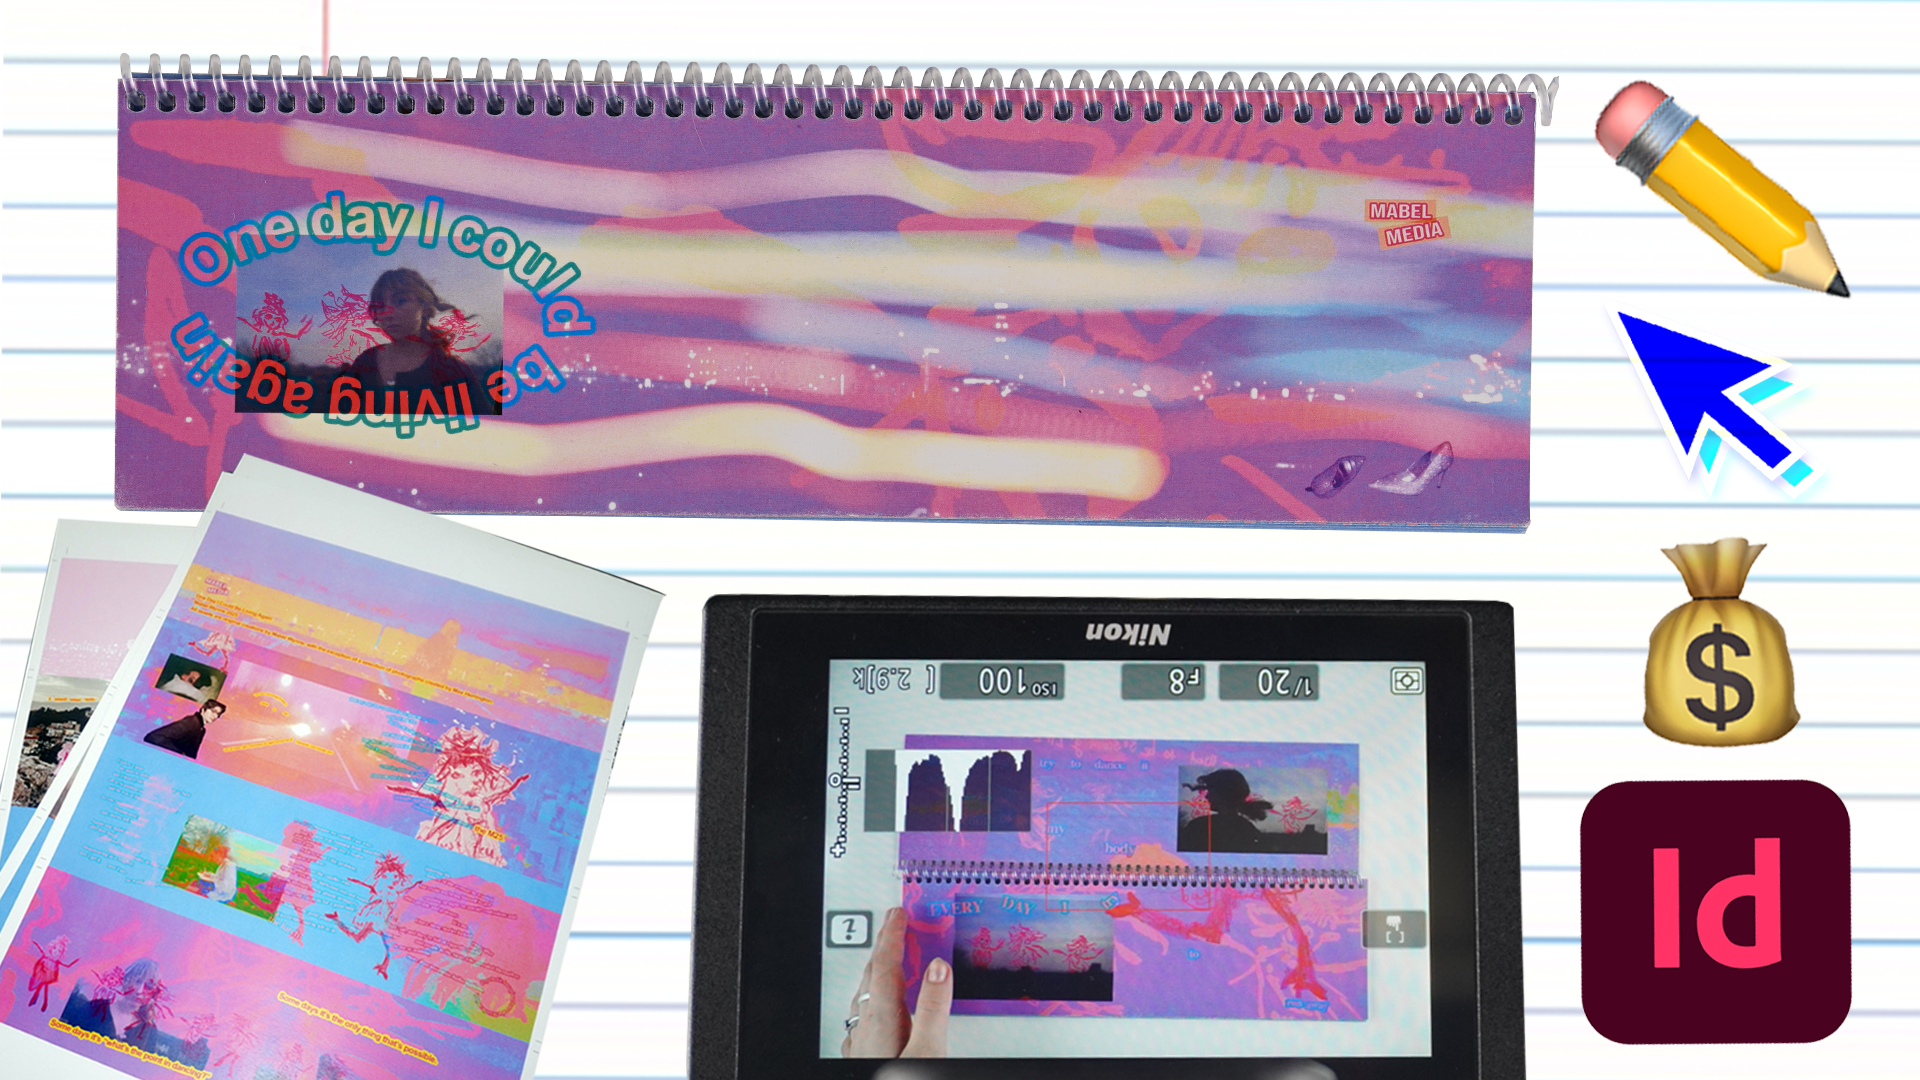
One of the most common mistakes new zine creators make is not properly setting up their InDesign document. Printers often find it frustrating when clients come in unprepared, especially when it comes to concepts like bleeds, slugs, and document dimensions. Taking the time to research and set up your document correctly from the start can save you a lot of stress and potential redesigns later on.
Bleed areas are essential to avoid any unwanted white edges after cutting. Slugs, which include information like page numbers and titles, should be placed outside the main content area. Ensuring that your document is set up correctly before reaching out to a printer can lead to smoother communication and a more professional outcome.
03. Choose the Right Printing Method
The world of printing offers a variety of techniques, each with its own unique characteristics. For example, Riso printing is ideal for two-tone color schemes and has become popular in the indie publishing scene. Mono-printing, on the other hand, offers a handmade, unpredictable look that works well for limited print runs. Digital printing provides vibrant colors and even special effects like glowing pages, while lithographic printing uses ink plates to produce high-quality results.
Understanding the pros and cons of each printing method can help you choose the one that best suits your vision and budget. Exploring these options in depth can give you a better idea of how they affect the final look and feel of your zine.
04. Plan Your Print Finishing
Print finishing involves cutting, folding, and binding the printed sheets into the final zine. While many printers offer this service, it's beneficial to have a basic understanding of the process, especially if you're aiming for a more hands-on approach. This knowledge can add value to your project and allow you to maintain greater control over the final product.
If you decide to handle the finishing yourself, it’s important to create test copies using scrap paper before working on your actual zine. This helps you identify any issues with the binding or layout before committing to the final product. Studios like New York's Center for Book Arts or London Print Studio offer great opportunities to learn and practice these techniques.
05. Always Do a Test Run
Before ordering a full print run, always do a test print. Even a small test using a desktop printer can reveal issues that may not be apparent on screen. Binding the test copy as well ensures that the final product will align correctly. I learned this the hard way by wasting money on multiple reprints, but investing time in a test run can save you both time and money in the long run.
06. Be Aware of the Costs
Producing a zine involves upfront costs, but with success, you can recoup your investment and potentially make a profit. It’s important to track every expense, from materials to printing, to calculate the cost per unit. Knowing your numbers will help you negotiate with stockists and set realistic pricing.
07. Don’t Make a Zine Just for the Sake of It
The indie zine scene can be competitive, but originality is key. If you create something genuinely unique, you’ll stand out. Stockists are looking for fresh, innovative projects, and if your zine resonates with the right audience, they’ll be eager to carry it.
08. Solo Projects Can Be Powerful
Not all zines require a team. Some of the most impactful zines are created by individual artists who pour their passion into the work. The zine movement began as an anti-commercial form of expression, so embracing that spirit can lead to powerful creative outcomes.
09. Know Your Numbers Before Approaching Stockists
Stockists are busy and expect you to be prepared. Knowing your wholesale rate, production costs, and profit margins is essential. Presenting yourself as a professional will increase your chances of being taken seriously. Be ready to discuss your numbers and remain flexible, but never compromise on your costs.
10. Build Relationships, Not Just Contacts
Networking is about building genuine connections rather than just collecting contacts. Attend events, engage with people in your field, and let your work speak for itself. Building relationships takes time, but it can open doors and create opportunities that go beyond just selling your zine.
By following these steps, you'll be well-equipped to create a successful zine that reflects your artistic vision and stands out in the market. With dedication and attention to detail, your zine can become more than just a publication—it can be a statement.
Post a Comment for "My First Zine: Lessons Learned"
Post a Comment