10 Simple DIY Tricks to Maximize Your Kitchen Cabinet and Drawer Space
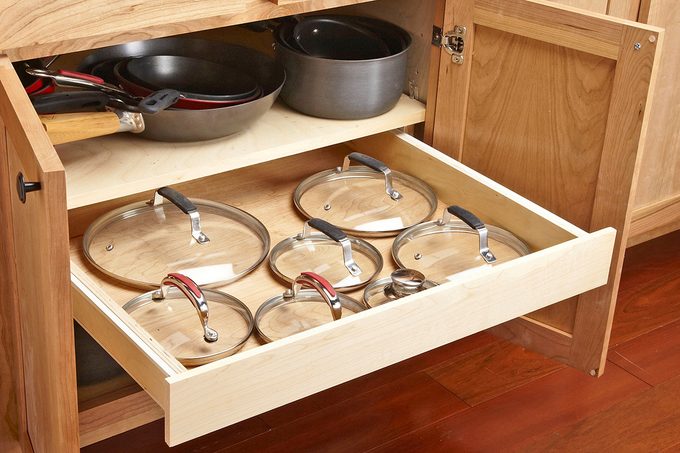
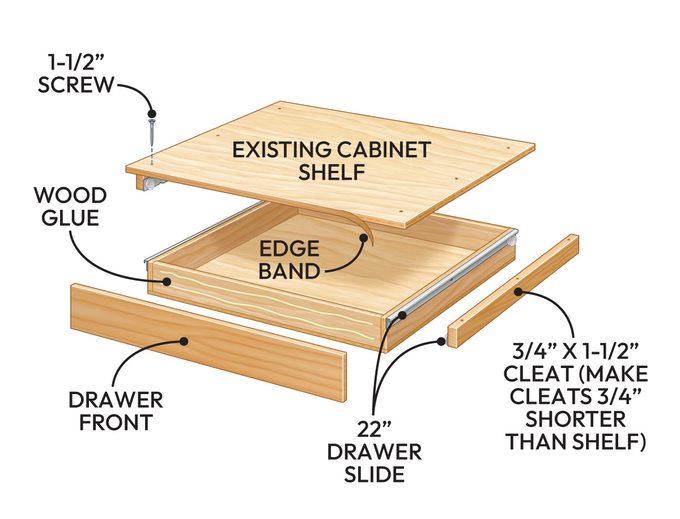
Rollout Drawer for Lids
A top-notch do-it-yourself cabinet organization idea involves creating a holder specifically designed for your pot lids. This ingenious solution allows you to install a drawer beneath your pot shelf—or even below another cabinet shelf—to store them efficiently. Below are the steps:
- Before removing the shelf, use a pencil to mark its width at the narrowest part of the cabinet opening, typically near the hinges. Ensure your drawer front and sliders do not exceed these markings; otherwise, you'll end up spending considerable time constructing a drawer that cannot be opened.
- Next, take off the shelf. Should it be constructed of particleboard, we suggest replacing it with 3/4-inch plywood and then transferring the markings onto the new shelf.
- Once you've constructed a basic drawer box, the remaining steps should be straightforward. Attach the drawer to cleats that have been secured with screws to the inside walls of the cabinet.
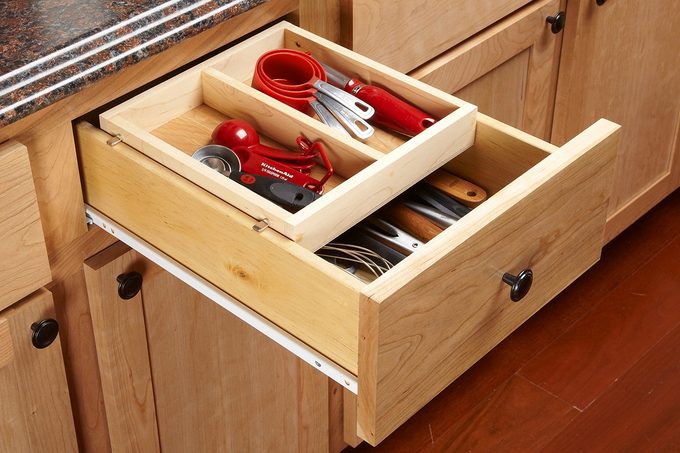
Drawer in a Drawer
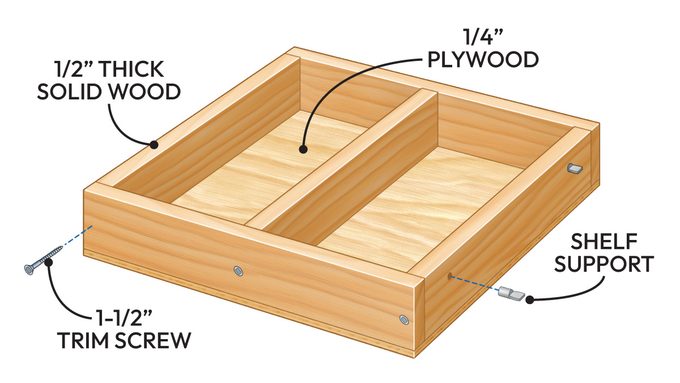
Large drawers frequently have an unordered mix of intertwined tools. We addressed this issue with a sliding tray design that forms into two smaller compartments. Ensure your creation is 1/8-inch thinner than the interior of the drawer, approximately half the length, and choose whatever depth suits you best. In our case, we opted for a depth of 1-3/4 inches.
When placing the holes for the adjustable shelf supports, avoid relying solely on measurements and calculations. Rather, place the tray within the drawer box so that it sits at least 1/8-inch below the edge of the cabinet opening, then create a marking on the tray. The shelf supports we use fit snugly into these holes; however, your specific ones might necessitate a bit of super glue for added security. This straightforward drawer operates using the shelf supports as its foundation.
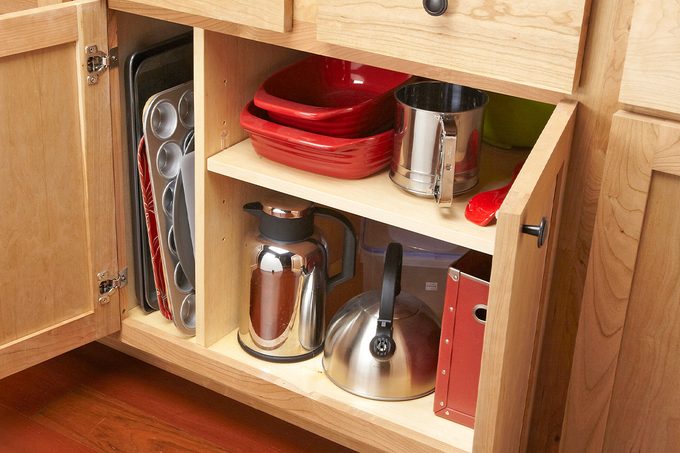
Insert a Separator for Vertical Storage
Certainly, the pan or tray you require is invariably found at the base of the stack! The simple fix for this issue is a homemade cabinet organizer. This tool enables you to keep larger, flatter items standing upright instead of piled together. As such, retrieving whatever pan you need becomes much simpler.
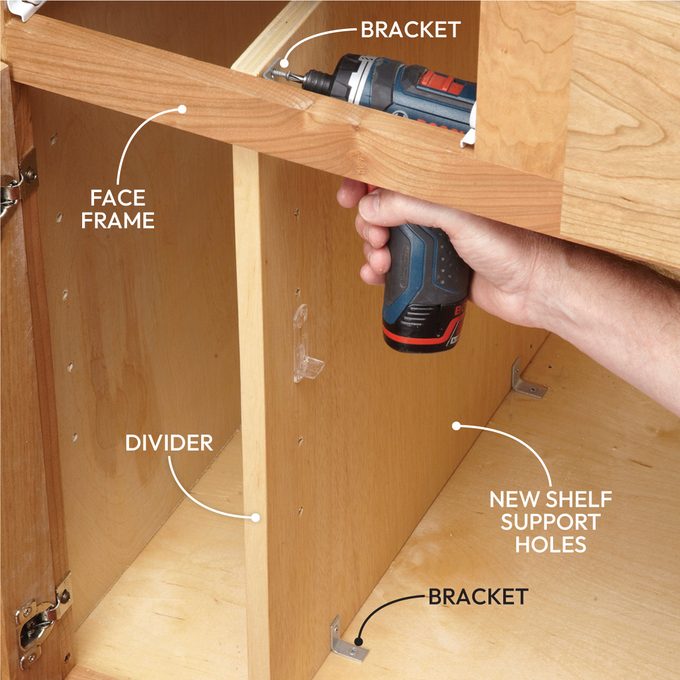
- Trim the 3/4-inch plywood to fit the width of the cabinet, ensuring it’s at minimum one inch higher than the aperture for securing it to the face frame as demonstrated.
- Bore support hole for the shelves that correspond with the pre-existing holes within the cabinet.
- Attach two brackets to the bottom of the cabinet: one should be fixed to the face frame, and another to the rear wall of the cabinet (which isn’t illustrated).
- Ultimately, trim the existing shelf to match the new area.
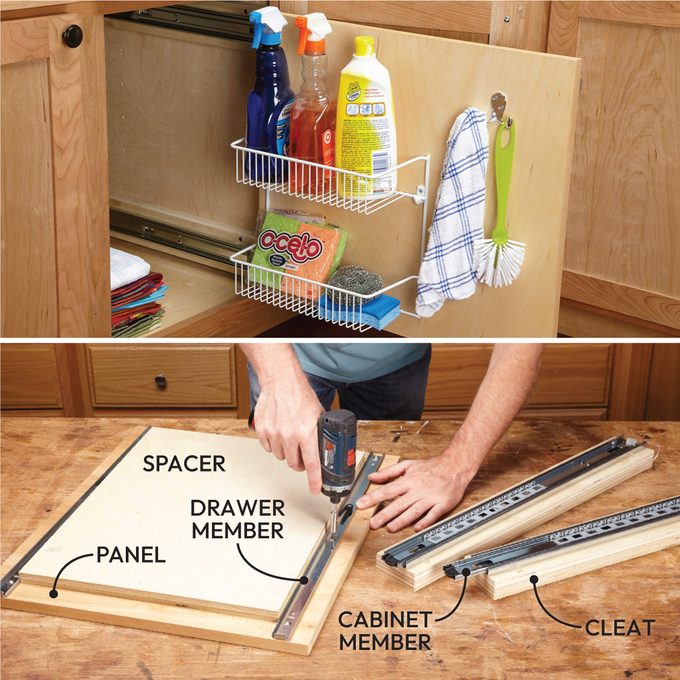
Rollout Storage Panel
If you're familiar with attaching a piece of plywood to drawer sliders, you can make use of all the clever shelving units, hooks, and organizers available at hardware stores. Using these accessories can prevent tiny items from disappearing in spacious lower cabinets.
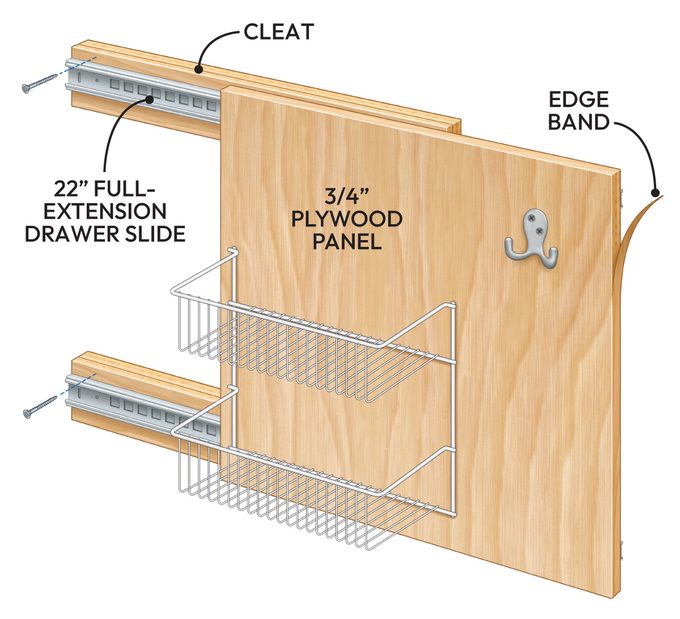
It’s straightforward provided you keep two key points in mind: Firstly, ensure that the drawer slides are aligned properly. Insert a piece of plywood spacer between the drawer components when securing them with screws to the panel. Attach the cabinet parts to the cleats using screws. Secondly, construct your cleats sufficiently thick to allow clearance for both the slides and the cabinet door hinges. To achieve this thickness, we adhered 1/2-inch plywood onto 3/4-inch plywood to create our cleats.
To mount the panel inside the cabinet, put together the slides again. Position the assembled unit against the back of the cabinet and push the panel outward approximately 4 inches. Secure screws into the cleats located at the rear, then pull the panel entirely outwards and fasten screws near the front area.
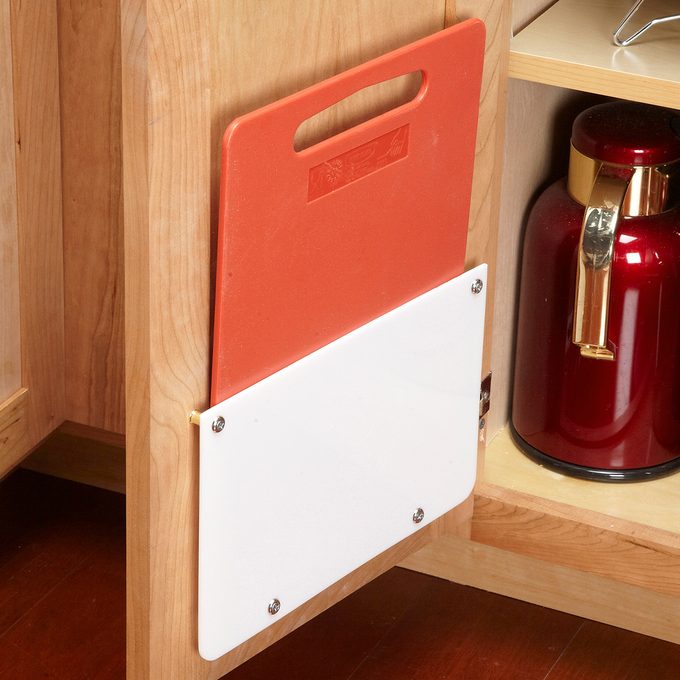
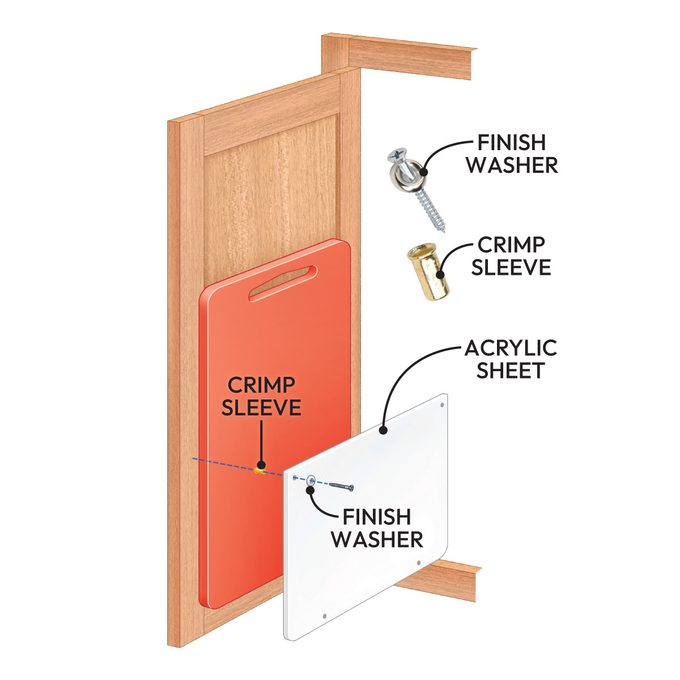
Cutting Board Storage
For storing cutting boards, attach a rack onto a cabinet door. Acrylic plastic at 1/4-inch thickness works well for this purpose—though plywood could be an alternative choice too. You have the option to use either a table saw or a circular saw when cutting acrylic, provided you make your cuts carefully and slowly. Remove any sharp edges using sandpaper before rounding off the bottom corners with a belt sander. As spacers, we utilized No. 14-8 crimp sleeves; however, tubes made from another material or wooden blocks would serve equally effectively.
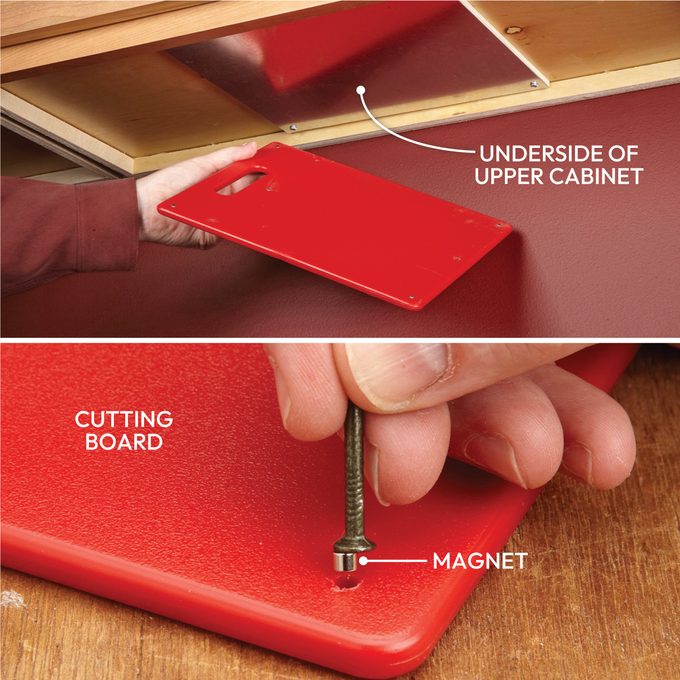
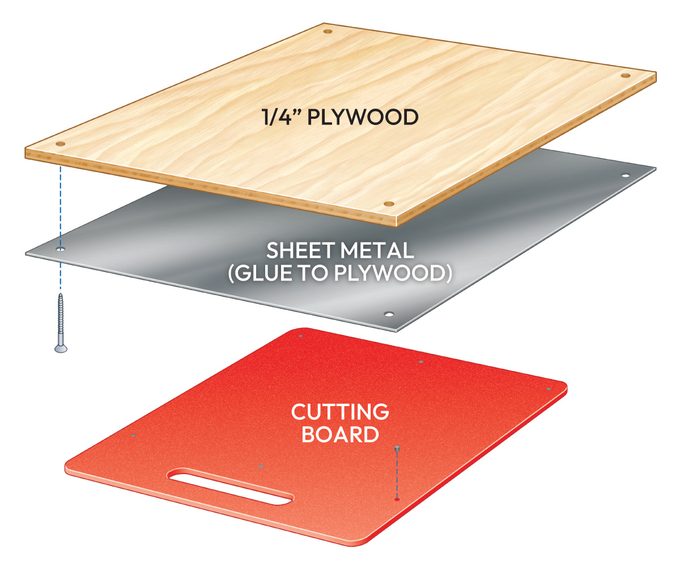
Hidden Cutting Board
For this homemade cabinet organizer project, primarily you'll require several small magnets. Attach these magnets at each corner of your cutting board and additional ones as necessary. Ensure the metal plate beneath the cabinet is bigger than the cutting board itself to facilitate simple storage. Adhere the sheet metal onto plywood using spray adhesive; remember to opt for galvanized steel over aluminum.
Pierce holes close to the edges and fasten the plywood beneath the bottom side of the cabinet using screws. Create openings suitable for the magnets and apply a small amount of super glue inside these spots. Position the magnets with their nail heads. Move the nail horizontally to free the magnet. The metallic sheet will attract the magnets effectively.

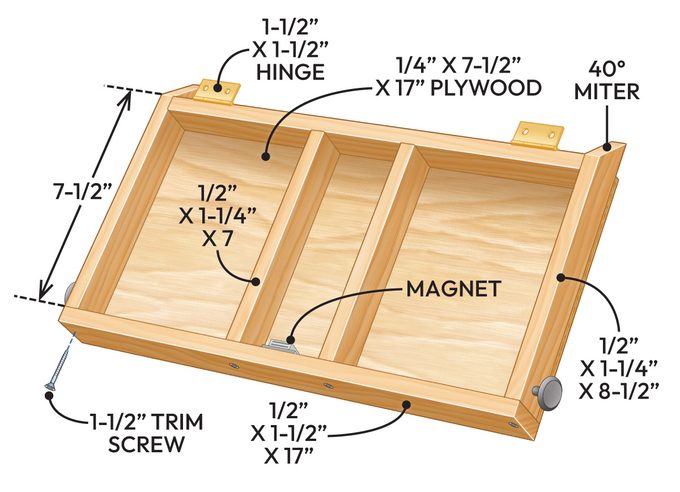
Flip-Down Paper Tray
This tray works great for organizing pens and paper. It remains largely concealed behind the cabinet face when shut. The hinges and magnets keep this tray securely positioned beneath an overhead cabinet. For installation, begin by attaching the hinges. Next, lift the cabinet door above it and secure the tray underneath the cabinet using clamps as you fasten the hinges to the cabinet itself.
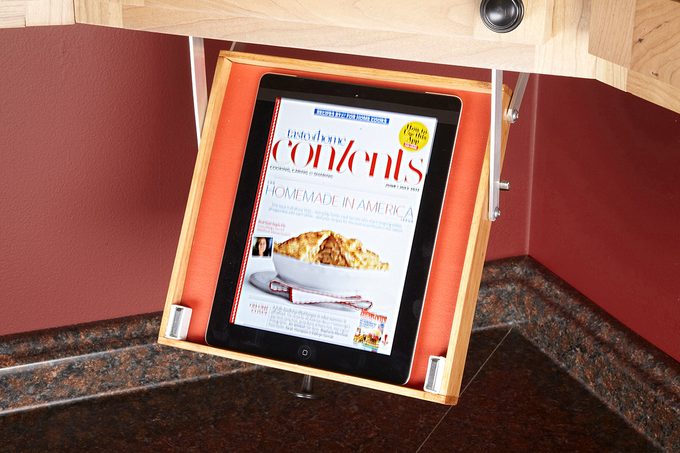
Drop-Down Tablet Tray
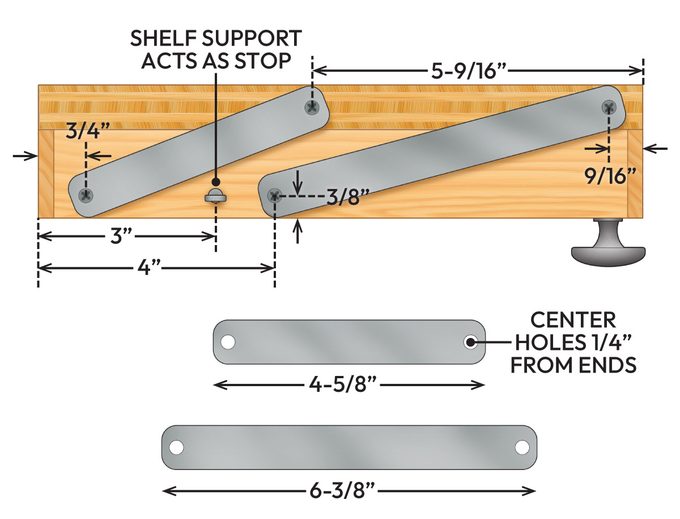
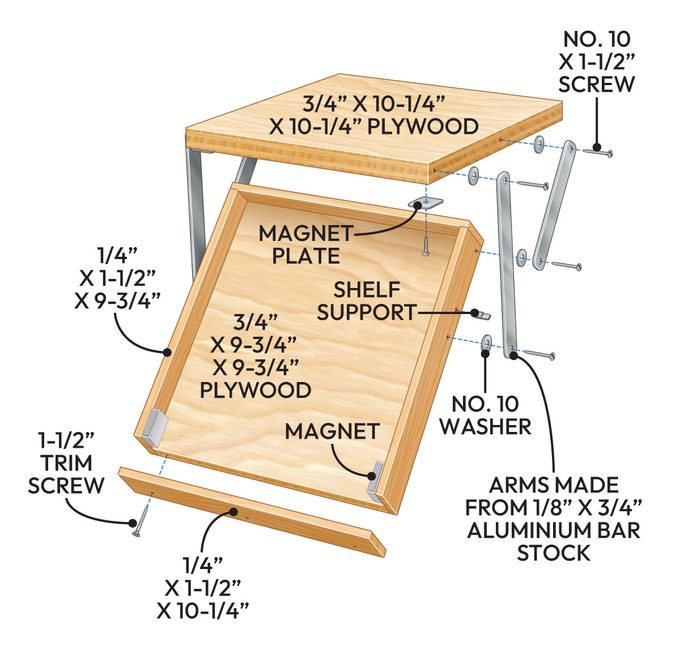
Have your tablet ready at hand and protected when you're busy cooking in the kitchen. This tray ensures your tablet or other gadgets stay above the counter surface. When lowered, it rotates forwards too, preventing obstruction from cabinets underneath. The design is straightforward—simply set up and adjust the arms precisely as demonstrated, ensuring seamless operation.
We shaped the aluminum pieces and smoothed their edges using a grinder. Once shut, tiny cabinet door magnets keep the tray secure. We removed the plastic tabs from the magnets before securing them with epoxy glue. A foam place mat was trimmed to serve as the lining inside the tray. This shelf can be folded upward against a piece of plywood at the top, making it an excellent choice for organizing your kitchen cabinets. Metal arms support the tray in place. Do not fret; these small magnets will not damage your tablet.
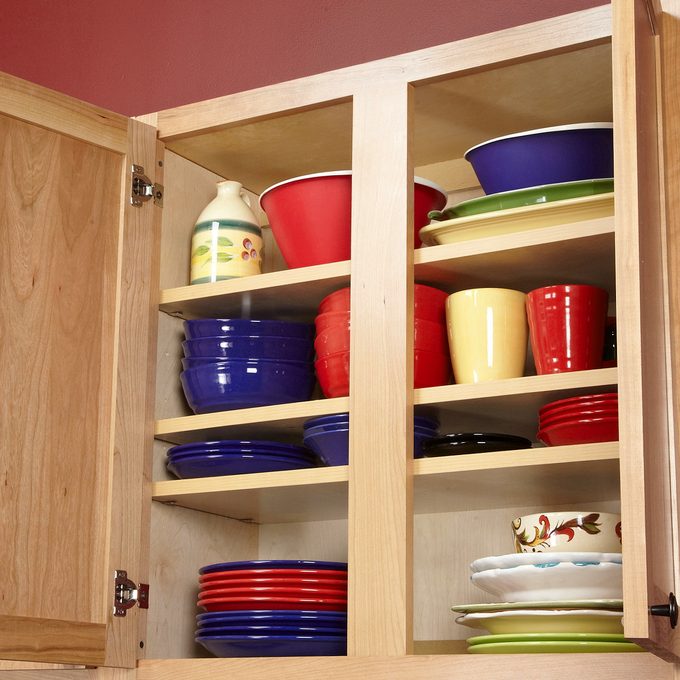
Add a Shelf
This do-it-yourself cabinet organizer initiative offers additional room for dishes and utensils in cramped kitchen cabinets. Typically, most cabinets feature just one or two shelves, which often leads to unused space. By installing an extra shelf or two into many of these compartments, you can enhance storage capacity significantly. For this task, all you'll require is 3/4-inch thick plywood along with a package of shelf brackets. These brackets are available in different sizes; hence, ensure compatibility by taking a current bracket when purchasing new ones at the hardware store.
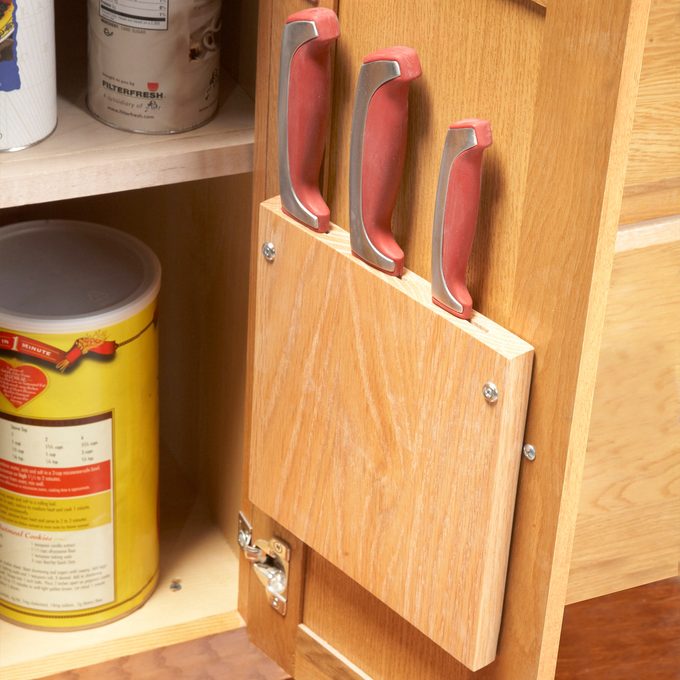
Cabinet Door Knife Rack
You can adjust this knife rack to fit any cabinet door and accommodate any desired number of knives for your kitchen cabinets. Constructing this cutting board-turned-knife rack requires only a table saw and some scrap wood.
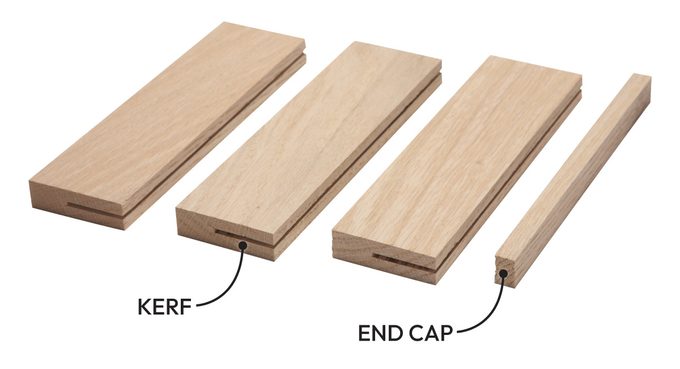
- Pass the remnants along the edge of the saw blade to create grooves.
- Modify the blade height according to the width of the knives you're using. Remember to take off the saw’s blade guard before making these cuts, hence exercise additional caution.
- Additionally, slice off a narrow strip to serve as an end cap.
- Glue and clamp the kerfed scraps together and sand the knife rack until the joints are flush.
- For mounting, utilize two 1-1/4-inch screws along with finish washers.

Drawer Dividers
This DIY drawer divider project Isn't restricted to just your clothing. You can adjust the designs for better customization within your drawer setup. Ensure your measuring cups stay neatly arranged, establish a clear spatula organizational method, and avoid the frustration of cluttered drawers.
Post a Comment for "10 Simple DIY Tricks to Maximize Your Kitchen Cabinet and Drawer Space"
Post a Comment